- Manual Way to Migrate SharePoint Site to Another Tenant
- Important Points to Consider Before Migration
- Step-by-Steps Process to Migrate SharePoint Site Across Tenants
- Post Migration Checklist
- Professional Way to Migrate SharePoint Site to Another Tenant
- Quick Process to Move SharePoint Site to Another Tenant
- Conclusion
- FAQs
When businesses grow, their data size and users also multiply with every passing day. This requires them to maintain additional storage and resources to keep the workflow consistent and minimize the downtime. Creating multiple SharePoint tenants is also one of the standard practices most enterprise-grade businesses follow.
These businesses often need to move site between tenants to consolidate the distributed units of their business. However, it is not an easy process to migrate SharePoint site to another tenant, especially if you’re not that technically proficient with the SharePoint backend operations. Plan your migration journey to be a smooth one, read this article that describes everything you need, including manual method and SharePoint migration tool to perform cross tenant migration with zero data loss and no hassle.
Manual Way to Migrate SharePoint Site to Another Tenant
Microsoft now allows you to move SharePoint site from one tenant to another with the help of cross tenant migration feature in SharePoint. however, it’s always a smart move to prepare and follow the SharePoint migration checklist to avoid errors and loopholes during the journey. With the help of simple PowerShell commands, SharePoint administrators can transfer their sites to another tenant.
Note: Cross tenant migration involves moving the content from the source to different destination tenant. It means if you try accessing site in source, there will be a link redirecting you to the destination. There is no delta pass migration or incremental transfers.
Important Points to Consider Before Migration
- Never pre-create a SharePoint site in the target tenant before migration as there’s no overwriting or merging of an existing file.
- Set the source SharePoint sites to Read/Write mode as the migration process might fail during Read-only mode.
- Create all the users and groups in the destination tenant beforehand.
- Assign appropriate licenses to each user either within the source or destination environment.
- Migration limit of SharePoint site is 5 TB (at max) or 1 million items (everything including files with versions, folders, etc.), otherwise the process will fail.
- Create target Office 365 groups in advance as you can't link target environment groups for group connected SharePoint sites to existing sites.
- No path can exceed beyond the limit of 400 characters.
Step-by-Steps Process to Migrate SharePoint Site Across Tenants
Follow the given step by step process for cross tenant migration of sites:
Step 1: Use Microsoft 365 Global admin or SharePoint admin credentials to login to SharePoint Management Shell.
Step 2: Run the following command and then enter the source admin username and password to connect.
Connect-SPOService -url https://<TenantName>-admin.sharepoint.com
Step 3: Similarly, connect the destination tenant using the above command and then enter the username and password of the target tenant admin.
Step 4: Run the given command on both tenants to get cross tenant host URLs:
Get-SPOCrossTenantHostURL
Step 5: Use the command given below on your source tenant to send a trust request to the target tenant:
Set-SPOCrossTenantRelationship -Scenario MnA -PartnerRole Target -PartnerCrossTenantHostUrl <TARGETCrossTenantHostUrl>
Step 6: Similarly, use the following cmdlet to send trust request to the source tenant:
Set-SPOCrossTenantRelationship -Scenario MnA -PartnerRole Source -PartnerCrossTenantHostUrl <SOURCECrossTenantHostUrl>
Step 7: In this step, you need to pre-create users and groups in the target tenant that you’re migrating from the source.
Step 8: Next, you need to create identity mapping file (CSV file) containing mapping of users and groups from the source to the tenant.
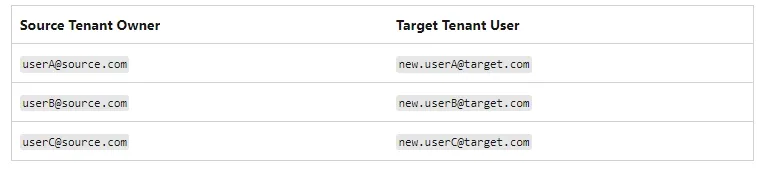
Note: When creating Identity mapping for sites connected to groups, make sure the target URL is aligned to the alias of the new group you’ve created in the destination.
Step 9: Verify the compatibility status of cross tenant migration using the following PowerShell script:
Get-SPOCrossTenantCompatibilityStatus -PartnerCrossTenantHostURL [Target tenant hostname]
Step 10: Run the following cmdlet as SharePoint or Microsoft 365 Global admin to start the migration:
Start-SPOCrossTenantSiteContentMove -SourceSiteUrl <…> -TargetSiteUrl <…> -TargetCrossTenantHostUrl <…>
Note: You can schedule migration for later with the following command:
Start-SPOCrossTenantGroupContentMove -SourceGroupAlias <…> -TargetGroupAlias <…> -TargetCrossTenantHostUrl <…> -PreferredMoveBeginDate <…>
Use the following command to terminate the process (if needed)
Stop-SPOCrossTenantSiteContentMove – SourceSiteURL [URL of Site you wish to stop]
Step 11: To check the migration status, use:
Get-SPOCrossTenantUserContentMoveState -PartnerCrossTenantHostURL [Target URL]
The command will show results as: NotStarted, Scheduled, Ready to Trigger, or InProgress.
Post Migration Checklist
Check out the steps you need to follow as post-migration care:
- Verify that the existing permissions and links are working as they were mapped within identity mapping files.
- Ask the users to sign-in to the target tenant using their new credentials.
- Validate that the entire content is migrated correctly in the correct structure.
- If the source environment is not needed anymore, decommission it once the target environment is stable.
Professional Way to Migrate SharePoint Site to Another Tenant
SharePoint experts often put down PowerShell scripts to migrate SharePoint sites because of their shortcomings. The manual migration can be full of errors as you need to configure everything from users to permissions mapping. Running commands on such a large dataset can be time-consuming and even a single wrong or missed command carries the risk of data loss. Moreover, you cannot rely on manual transfer for functionalities like incremental migrations and detailed reports.
Such limitations of the native approach create the need to use an advanced Kernel Migration for SharePoint tool. it is designed with advanced algorithms and embedded with features that simplify the process for all users. Let’s have a look at the features this tool has to offer:
- Migrate SharePoint hub sites, sub-sites, sites, and site collections.
- Migrate SharePoint online site to another tenant as new or existing site.
- Migrate bulk data between SharePoint tenants without any restrictions.
- Migrate SharePoint lists and libraries from one site to another.
- Allows you to secure your data with the easy SharePoint backup.
- Selective data migration to provide complete control on what you migrate.
Quick Process to Move SharePoint Site to Another Tenant
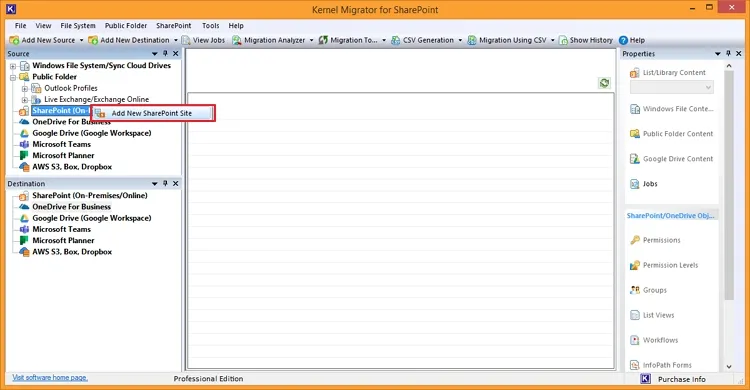
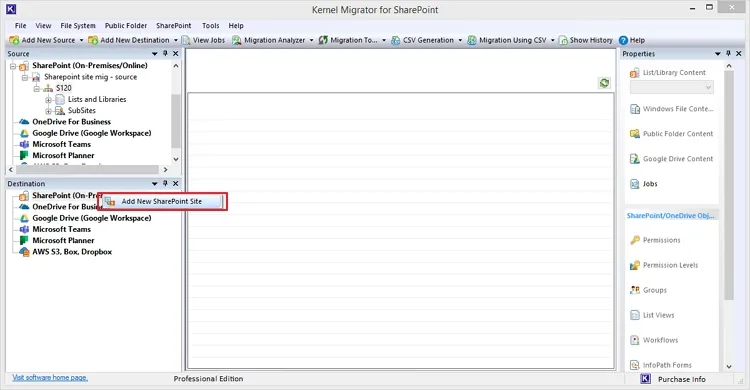
Step 1: Launch the tool and right-click on SharePoint (On-Premises/Online) to select Add New SharePoint Site.
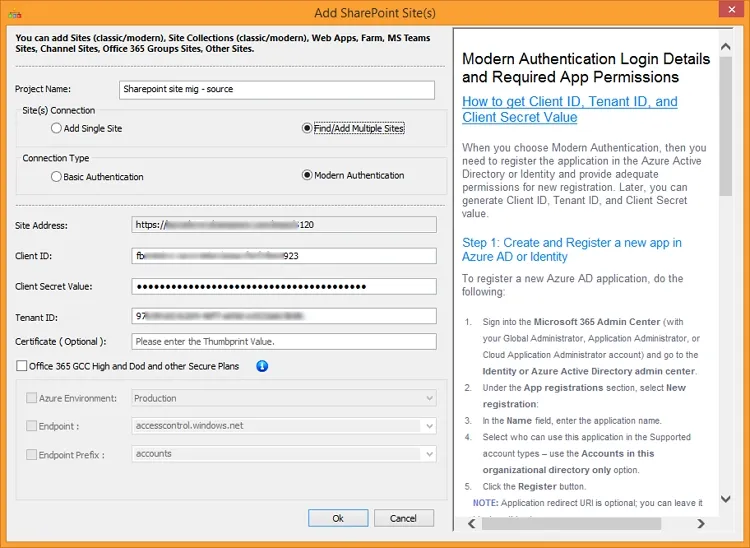
Step 2: Enter a Project Name, choose site connection, and then provide the required credentials.
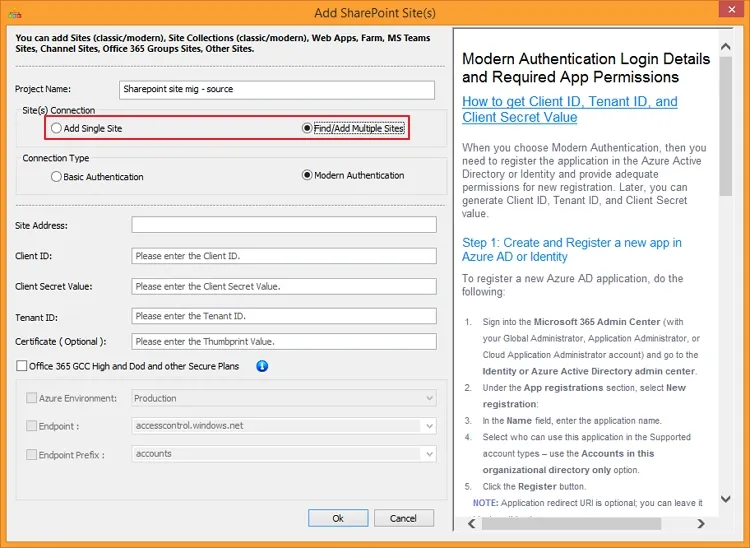
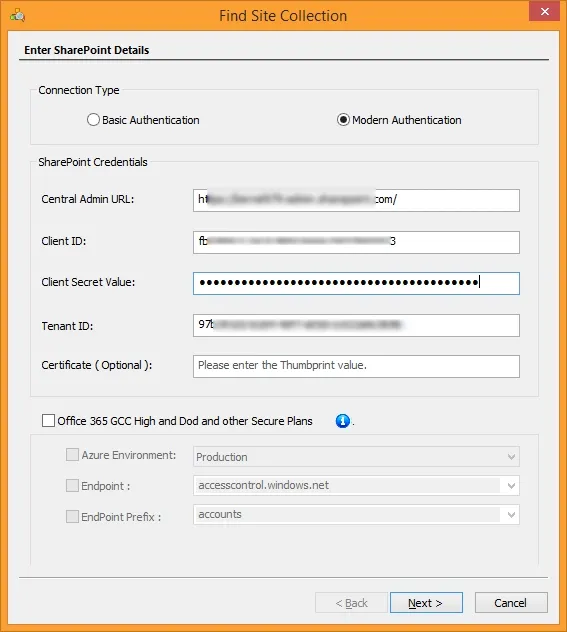
Note: We are proceeding with Find/Add Multiple Sites, for which you’ll need to enter the Central Admin URL and other credentials.
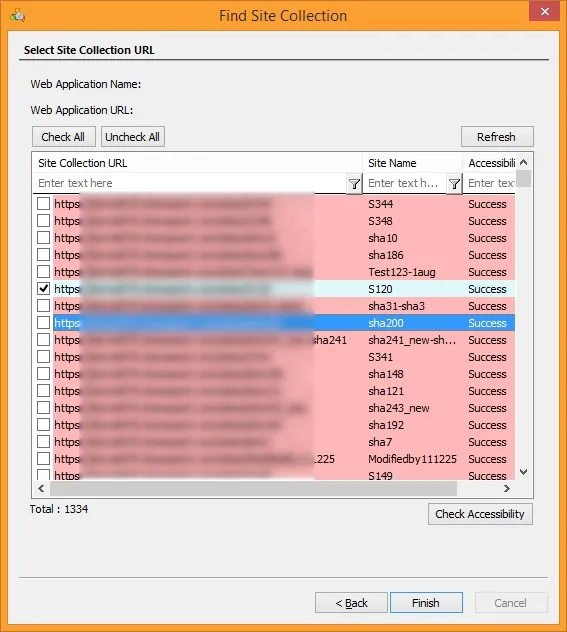
Step 3: Select the site you want to migrate and click on the check Accessibility button to verify the accessibility status. Click Finish.
Step 4: All the entries to add the source site will be automatically filled. Click OK.
Step 5: Similarly, go to the destination pane and add the tenant in the destination to migrate the site.
Step 6: After adding the source and destination, right click on the source site and select Migrate To and proceed.

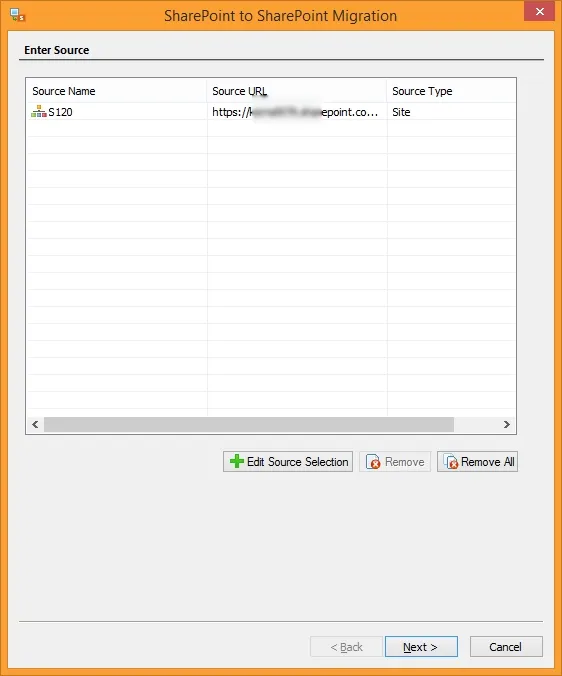
Step 7: In the next screen, the tool shows the source information. You can also edit the selection if required. Click Next.
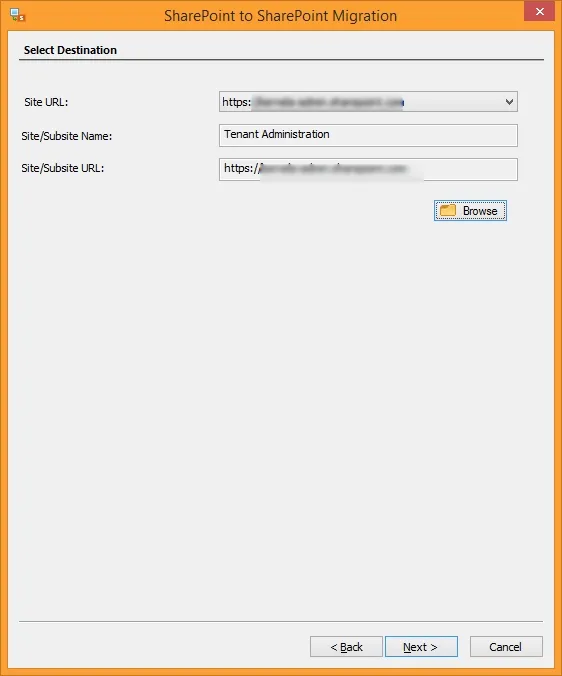
Step 8: Select the Destination URL and then Site/Subsite URL using the Browse button.
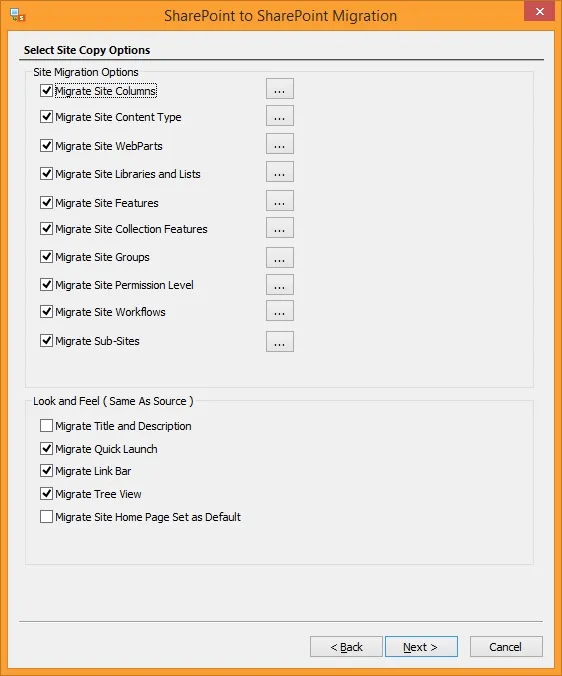
Step 9: Select the Site Copy options that seem suitable according to your requirements.
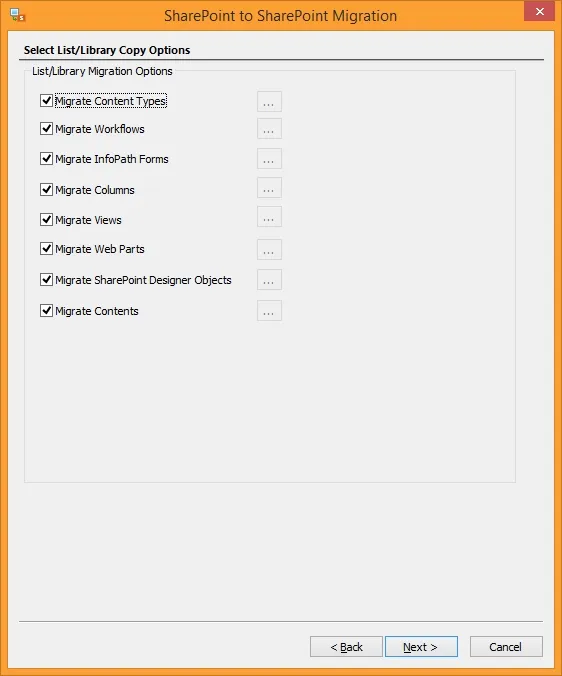
Step 10: Now, select the suitable List/Library Copy Options and click Next.
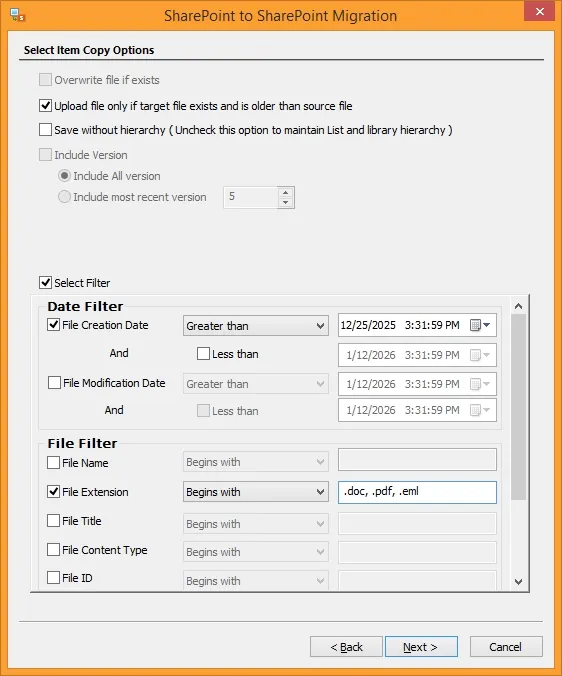
Step 11: From the Select Item Copy Options, apply the desired options and choose filters from Version filter, Date, File, and User filter. Click Next.
Step 12: Mark the checkbox Migrate Permissions: (Site, Groups, Site permission levels, List & Library, Folder & Items) to move permissions with other data.

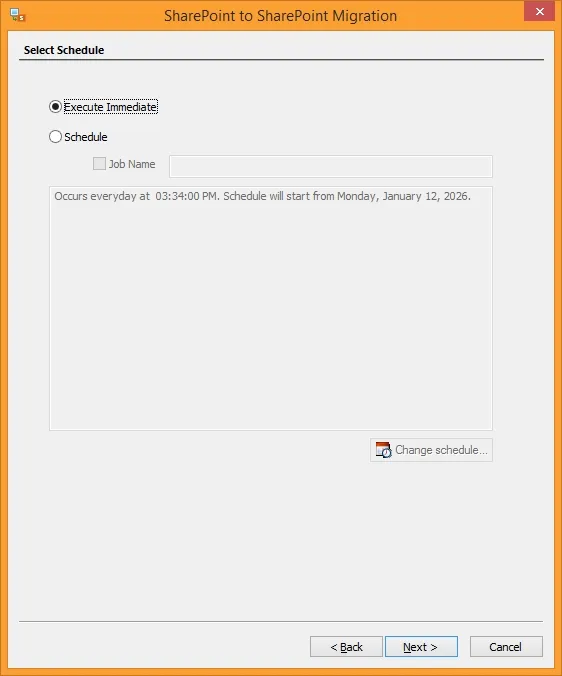
Step 13: Select if you want the migration process to Execute Immediate or Schedule it for later. Click Next.
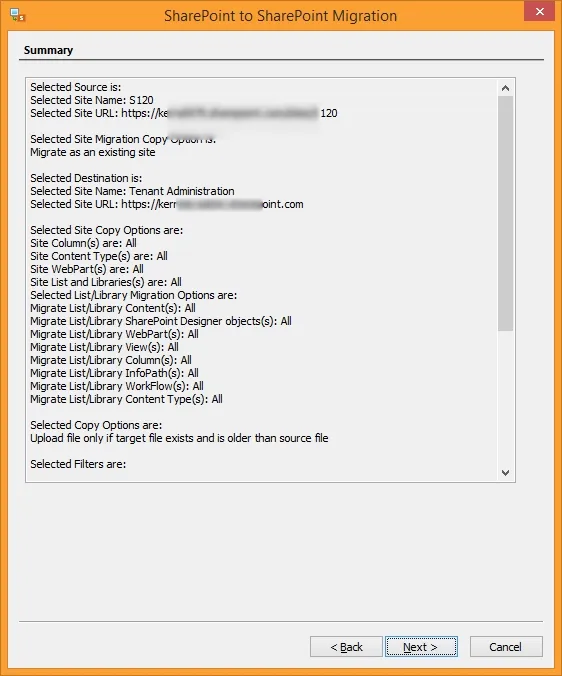
Step 14: Review the migration summary to see that everything is selected as required and click Next to proceed further.
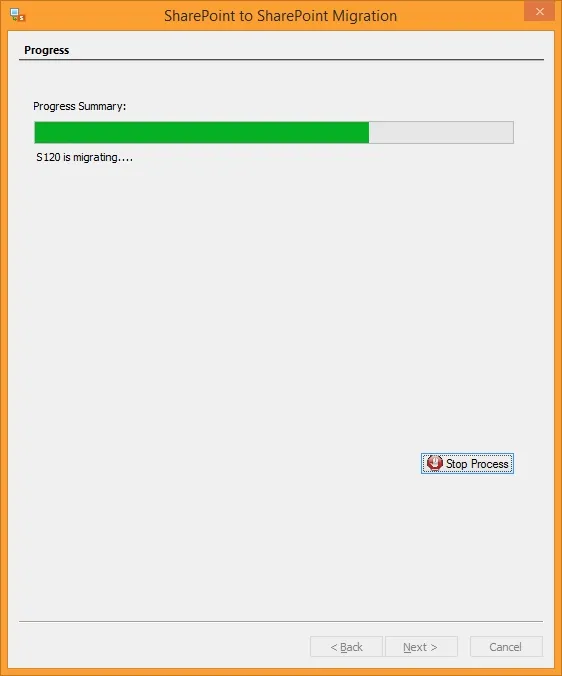
Step 15: The migration process will begin with real-time progress on the screen.
Step 16: Once completed, the tool will show you a Completion Summary of the process with all the details, such as Operation, Object Name, etc. Click Finish.

With this, the tool will complete the migration process with just a few simple clicks. No complex commands, instructions, or technical skill are involved, and you can still move SharePoint site from one tenant to another.
Conclusion
With both the methods thoroughly explained in the article, it is clear that choosing the manual method can cost you a lot if anything goes wrong. Your complete business data is at stake, therefore, you need to be mindful and choose a tool like Kernel Migration for SharePoint. This tool will help you simplify the process and transfer data with the metadata, versions, and permissions, irrespective of the complexity involved.
Frequently Asked Questions
Q. Why do I need to backup data before SharePoint site migration to another tenant?
A - Whether you migrate SharePoint online site to another tenant, it is always a great practice to backup SharePoint site data to avoid data loss under all circumstances. You can use a SharePoint backup tool to secure your data with the original hierarchy.
Q. How to keep the destination tenant organized after migration?
A - To keep your tenant organized, make sure you perform a data cleanup before starting the migration process in the source. You can get rid of the data that you don’t need for future operations. Remove the inactive sites and the sites that are less used by visitors.
Top-Rated Software to Easily Migrate SharePoint Site to Another Tenant.