Businesses that use Office 365 clearly understand the associated risk of putting essential business information over it. This is why they’re always on the hunt to find effective security measures for avoiding ransomware and other cyber-attacks. To safeguard sensitive business data, Microsoft provides effective Office 365 data loss prevention policies.
Data loss prevention is a part of Microsoft Purview tools that shields sensitive information. This article shows how to use Microsoft 365 data loss prevention policy to detect, monitor, and protect data across all components of Office 365.
What is Office 365 data loss prevention?
Organizations store a lot of critical data on the cloud, such as financial information, proprietary data, health records, etc. Losing such classified data to virus intrusion, phishing, and cyber-attacks is a common challenge for online businesses. Data loss prevention policies reside within Microsoft Purview tools and prevent unauthorized access to Office 365 data.
What you can do with an Office 365 DLP policy includes:
- Identify and protect sensitive business data from unauthorized access.
- Protect your business reputation by lowering the chances of data breaches.
- Maintain the data confidentiality providing better control on how it’s shared and accessed.
- Help businesses meet GDPR, HIPAA, and other regulatory compliances.
- Enhance security using measures like data encryption and Advanced Threat Protection.
What are the Office 365 components to apply o365 DLP?
With Microsoft 365 data loss prevention, you can easily identify, monitor, and protect data across components, such as:
- Teams, Exchange, SharePoint, and OneDrive
- To Office applications, such as Word, Excel, and PowerPoint
- Microsoft 365 Copilot (preview)
- On-premises file shares and on-premises SharePoint
- Fabric and Power BI workspaces
- Windows 10, Windows 11, and macOS endpoints
- Non-Microsoft cloud apps
What are the prerequisites for setting up Office 365 data loss prevention?
Before you begin to setup data loss prevention Office 365, here are a few things that you need to arrange:
- Office 365 subscription with E5, E3 + Compliance Add-on, Enterprise E3/E5, E5 Compliance, or E5 Information Protection & Governance licenses.
- An administrator account with licenses and necessary permissions like Global admin, Compliance or Security admin, and Exchange Online, SharePoint, and Teams Admin Roles.
- Exchange Online, SharePoint Online, and OneDrive for Business enabled
- Microsoft Teams (if applying M365 DLP for chats/channels)
- Azure Active Directory
- Access to Microsoft Purview Compliance portal
How to configure Microsoft 365 data loss prevention?
Let's now move towards the process to learn how can you configure data loss prevention in Office 365:
Start by identifying and classifying sensitive data
Information is an extremely crucial asset that a business can own in the digital world. Businesses need to shield this information to keep them operational in the long run. Start the process with the proper identification and classification of the sensitive data that your organization manages on Office 365.
Analyze what data and where it is stored within Office 365. Once you identify the information available, classify it on the level of sensitivity.
- PII (Personal Identifiable Information), including names, addresses, email addresses, phone numbers, and Social Security numbers.
- Financial data, such as credit card numbers, financial reports, etc.
- Proprietary data, trade secrets, and other confidential information.
Apart from the above mentioned, you can create a custom classification of the sensitive data.
Collaborate with business owners to map workflows
Work closely with business owners to collaborate and find out the way sensitive data is used, stored, and shared. Moreover, you’ll be able to analyze the user behavior (acceptable and restricted) and risks associated with sensitive data. It will help you define custom Microsoft 365 data loss prevention policies that preserve sensitive information.
Create and configure data loss prevention policies in Office 365
Data loss prevention policy Office 365 mentions the action to take whenever a sensitive action is made within Office 365. The next step is to create DLP policies o365 and configure the policy settings as below:
- Specify the actions that trigger the sensitivity in the policy
- Define the actions to take whenever a sensitive information is found
- Decide how the users will be notified of the infringements
Step-by-step process to set up DLP in Office 365
In the following process, we will apply Microsoft 365 data loss prevention policy. It aims to block emails containing credit card numbers or information with high confidence label sensitivity. The applied policy will exclude the email if sent from the specified team to the mentioned recipient. Open Office 365 on your browser, login using the administrator credentials, and follow the given steps:
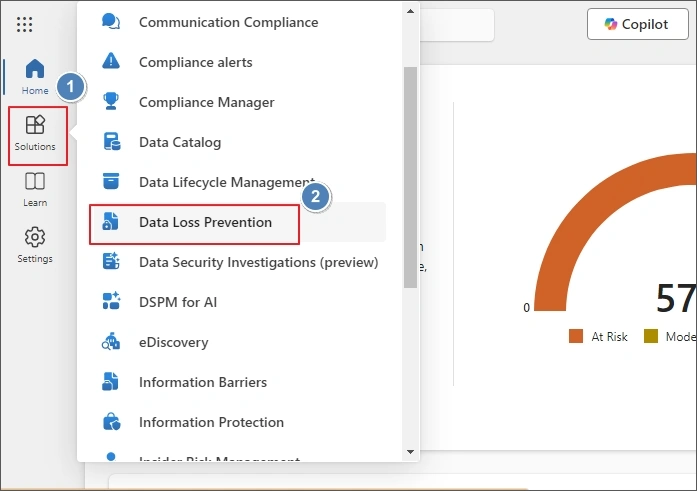
Step 1: Sign in to Microsoft Purview portal, go to Solutions and open Data loss Prevention.
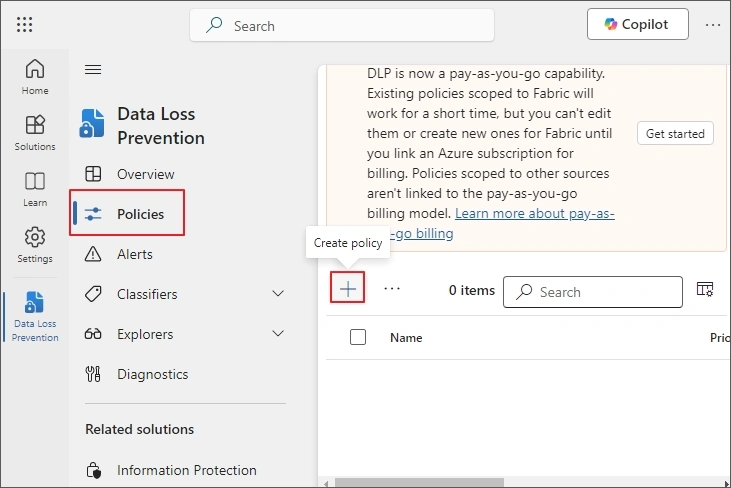
Step 2: Go to Policies and click + Create policy.
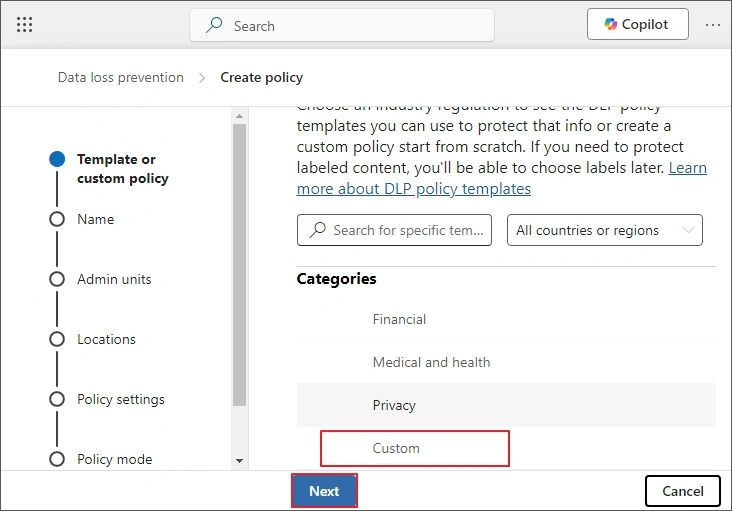
Step 3: Select Custom from Categories and then Custom Policy from Regulations list. Click Next.
Step 4: Provide a Name and Description to the policy and hit the Next button.
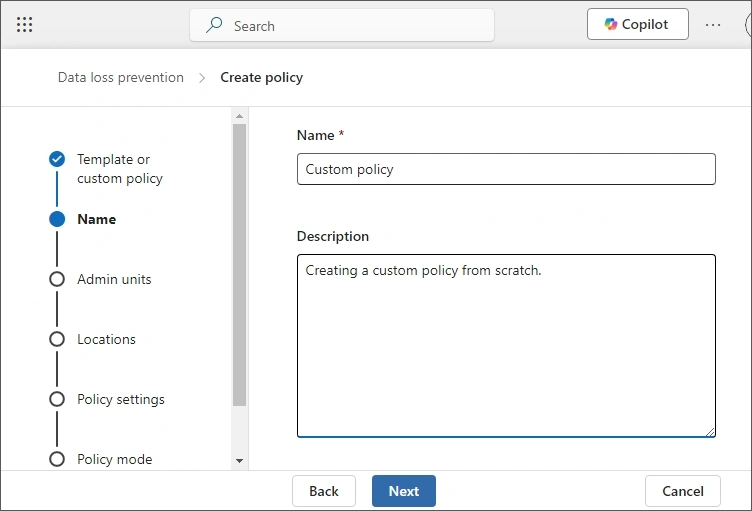
Step 5: In the next step, Assign admin units and select the default setting to apply policy to all the users. Click Next.

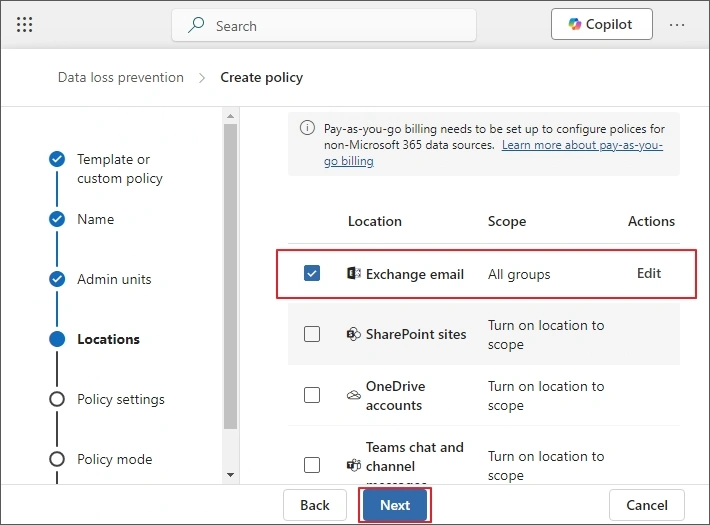
Step 6: From the Locations page, select location to apply the policy. Select Exchange email and deselect all other locations and press Next.
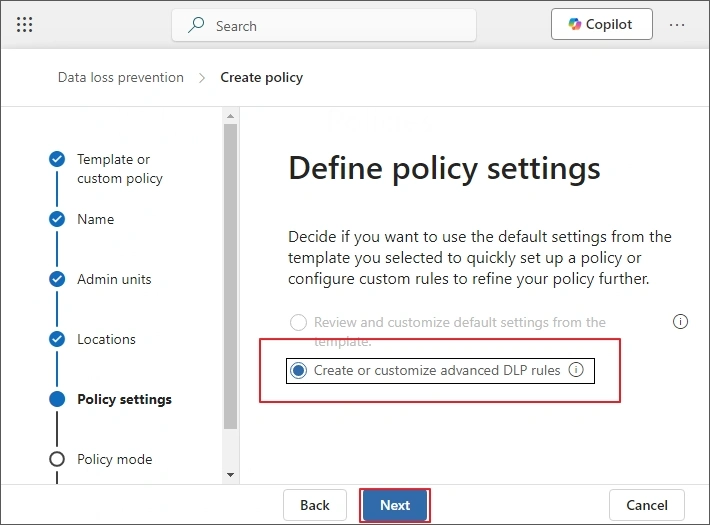
Step 7: Select Create or customize advanced DLP rules from the Define policy settings page. Choose Next.
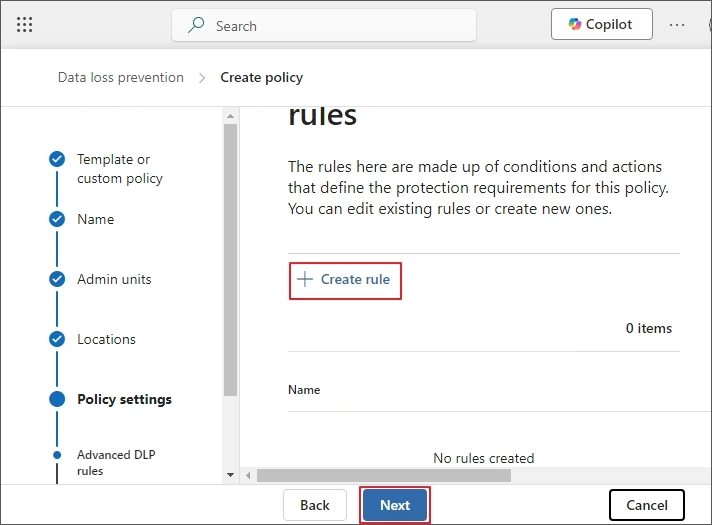
Step 8: Select Create rule and provide a Name and a description.
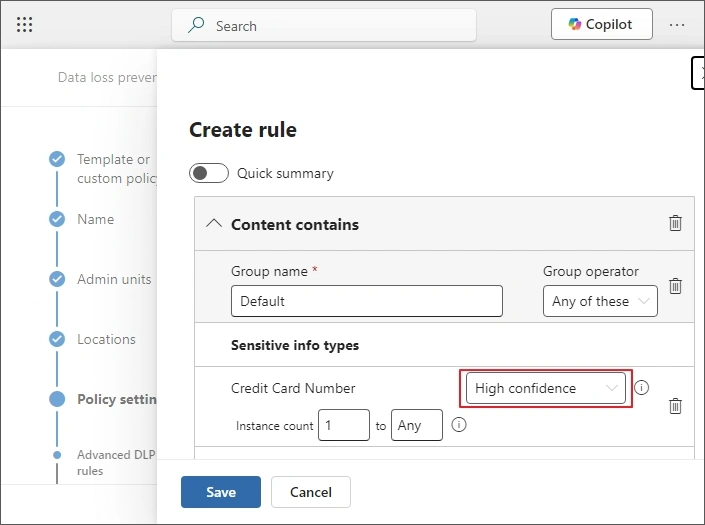
Step 9: Scroll down to Conditions, select Add condition > Content contains
Step 10: Select Add and from Sensitive info types select Credit Card Number. Tap on Add button.

Note: You can add more Content contains, select Add, then Sensitivity labels and choose High confidence and then click Add.
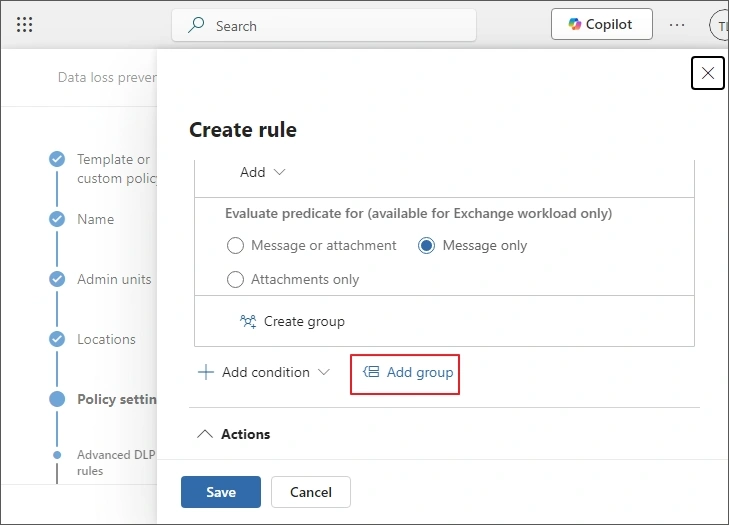
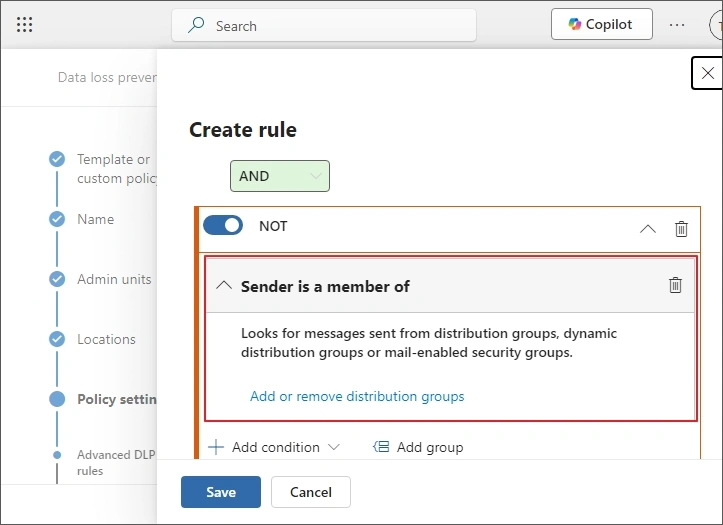
Step 11: Choose Add group and set the Boolean operator to “AND” and toggle to “NOT”.
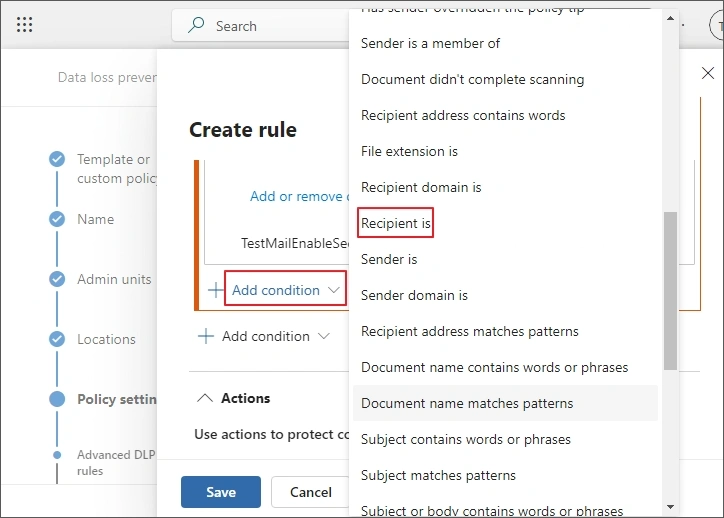
Step 12: Select Add condition > Sender is a member of > Add or remove distribution groups.
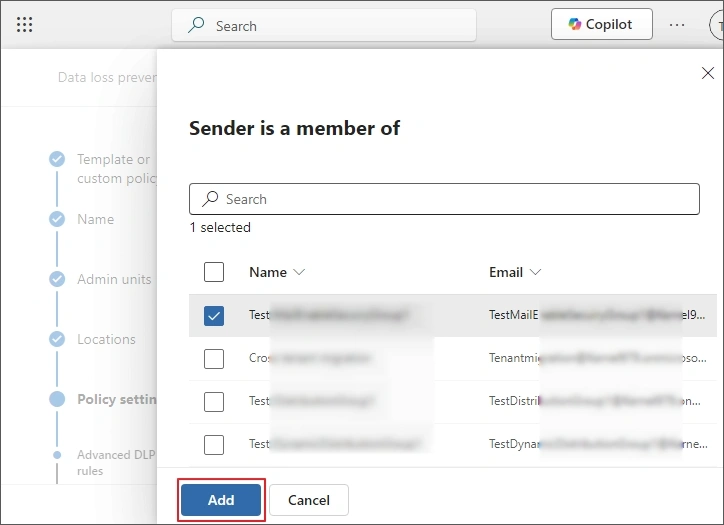
Step 13: Select name of the distribution group and then choose Add.
Step 14: Choose Add condition > Recipient is, enter the email address and select Add.
Step 15: Scroll down and select Add an action and then choose Restrict access or encrypt the content in Microsoft 365 locations.
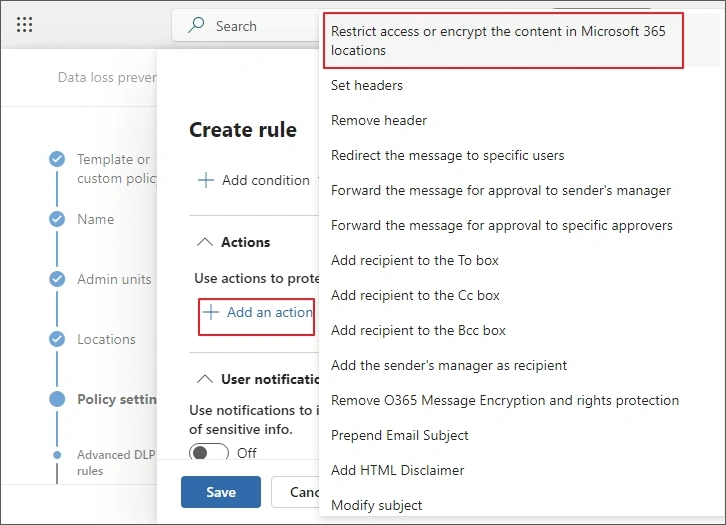
Step 16: Select Block users from receiving email or accessing shared SharePoint, OneDrive, and Teams files, and Fabric and Power BI items > Block everyone.
Step 17: Turn On the User notifications and mark Email notifications then select Notify the person who sent, shared, or last modified the content.
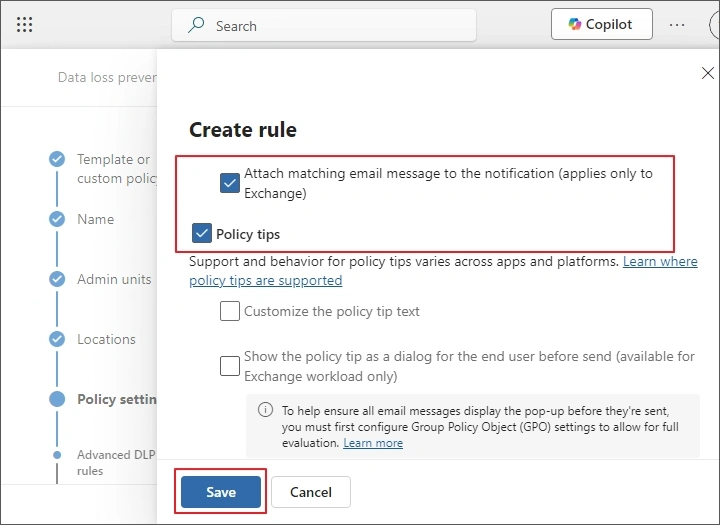
Step 18: Select Attach matching email message to the notification and then Policy tips.
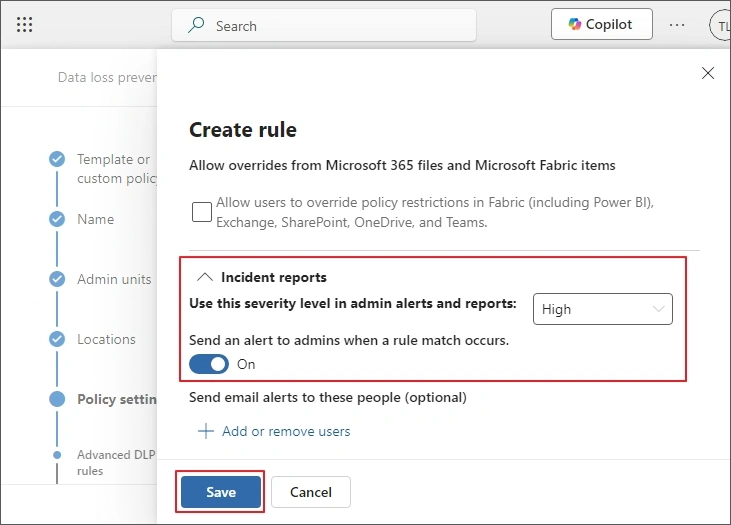
Step 19: Set Use this severity level in admin alerts and reports to High and turn On the Send alert every time an activity matches the rule option. Choose Save.
Step 20: Choose Next, then choose Run the policy in simulation mode, click Next and then Submit. Choose Done.

Train users and monitor
After creating and configuring policies, train your users to effectively use the policies within your organization. Provide them with easy guides and training sessions to understand the change and how it’ll affect their daily tasks.
Monitor the violations
In the end, set up some monitoring policies to take action against the violation. Execute scenarios that might lead to the breach of the Office 365 data loss prevention policy to see how it works. Gather your users' feedback and use it to lower the false alarms for the efficiency of the policy.
To improve the strength and proficiency of your policies, regularly review them and revise them to make sure they're relevant for your business. You can use the role-based access control to prevent unauthorized access and lower data breaches. And don't forget to upgrade the security with measures such as data encryption and multi-factor authentication. It will provide a strong defence mechanism for sensitive business data.
Office 365 DLP Limitations
Below are some limitations you must know about before using Office 365 Data Loss Prevention capabilities:
- DLP cannot provide complete security to your data against malware, ransomware, or misconfiguration errors.
- Without an experienced professional, you can face complexities in accessing an enterprise DLP solution.
- The process relies on the internet connection, which means the policies won't work if you don’t have a stable connection.
- Configuring Microsoft 365 data loss prevention is time-consuming and requires technical expertise.
- May generate false alarms, leading to inaccurate data blocking.
How to protect your critical data?
While DLP for Office 365 can help you safeguard your data to an extent, you must know how to keep your data safe. There are several situations that can lead to potential data loss. To avoid this, use a professional Office 365 backup tool to extract data from Office 365 apps and save it to your local storage.
Kernel Office 365 backup is an efficient tool that supports easy backup of all or selective data from your Office 365 tenant. Some prominent features of the tool include:
- Backup Office 365 mailboxes to local/ NAS storage.
- Extract Office 365 contacts and calendars to VCF and ICS files.
- Split PST feature to allow easy management of large mailboxes.
- Advanced filters to backup specific mailbox items.
- Schedule backup processes to save data according to your convenience.
Here is a short process explaining how to backup Office 365 data with this tool:
Step 1: Launch the tool and click Backup to add the source Office 365 mailbox using Modern authentication.
Step 2: Enter the required credentials, connect the tool and click Set Filter and Migrate to select source data.
Step 3: Apply the suitable filters according to your requirements. Click I am OK, Start Migration.
Step 4: Select Output type and provide file saving location.
The tool will begin the process, and after the completion, you can save the backup report.
Conclusion
With data loss prevention policies, you can protect the Office 365 data, but there’s no guarantee that there will be no data loss. In such instances, using an efficient Office 365 backup tool will help you easily backup and restore Office 365 emails, contacts, calendars, etc. Storing a backup with Kernel Office 365 backup solutions ascertains zero data loss. Use the free trial version to get hands-on experience with the tool and backup your Exchange Online, OneDrive, SharePoint, Teams, and other Office 365 components.